Transcribing audio on a Mac used to mean paying for software or relying on unreliable online services. Now, it’s completely possible to do it for free—and you don’t need to be a developer or technical expert. With a few basic steps, anyone can use artificial intelligence to transcribe interviews, meetings, voice notes, or podcasts without spending a cent.
The tools are already available, and they work surprisingly well. If you have a Mac and access to the internet, you're already halfway there. What matters most is knowing how to set it up properly and choosing the right software.
Install MacWhisper – The Free App That Does It All
The easiest and most reliable way to transcribe audio on a Mac is by using an app called MacWhisper. It’s built around OpenAI’s Whisper model, a highly accurate speech recognition system. MacWhisper is a native macOS application, so you don’t have to deal with browser-based tools or clunky web uploads. Best of all, it’s free to use for most people’s needs.
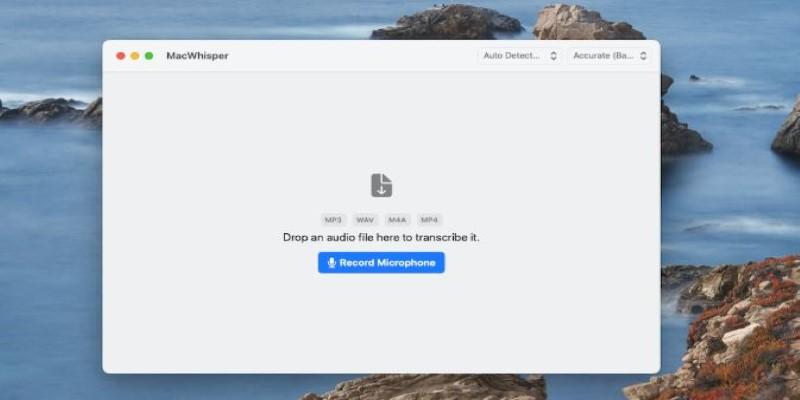
To get started, head to the official MacWhisper website (search "MacWhisper GitHub" or "MacWhisper download") and grab the latest version. It comes as a regular .dmg installer, which you can open and drag into your Applications folder just like any other Mac app.
Once installed, launch the app. The interface is clean and self-explanatory. You simply drag and drop your audio file into the window, pick your language and transcription model, and hit “Transcribe.” If you want faster performance and don't mind the app downloading a larger model, choose the "medium" or "large" models for improved accuracy. Smaller models work fine too, but may miss things in noisy or fast-paced recordings.
Understand What Audio Files It Can Handle
MacWhisper supports a wide range of audio formats—MP3, M4A, WAV, FLAC, and even video formats like MP4 and MOV. If your recording is on your phone, just airdrop it or use iCloud Drive to bring it to your Mac. Voice memos from iPhone are in M4A format, which works without needing conversion.
If your file is in a less common format or has compatibility issues, you can use a tool like Audacity (free) or VLC to convert the file. But in most cases, MacWhisper handles the usual formats out of the box. Just make sure the audio is clear. No tool—free or paid—can fix heavily distorted, overlapping, or inaudible recordings.
As for length, the app doesn’t impose harsh limits. You can transcribe a five-minute voice note or a three-hour podcast episode. Longer files take more time and computer memory, especially if you choose the higher-quality transcription models. MacBook Air users might prefer the base or small model to avoid overloading the system, while newer MacBook Pros can handle more demanding processing.
Let the AI Do the Work—Then Check and Edit
Once you drag your file into MacWhisper and choose your model, the transcription starts. It works offline, which is a big plus—no file uploads, no waiting for servers. Depending on your Mac’s speed and the model you selected, the process can take anywhere from a few seconds to several minutes.
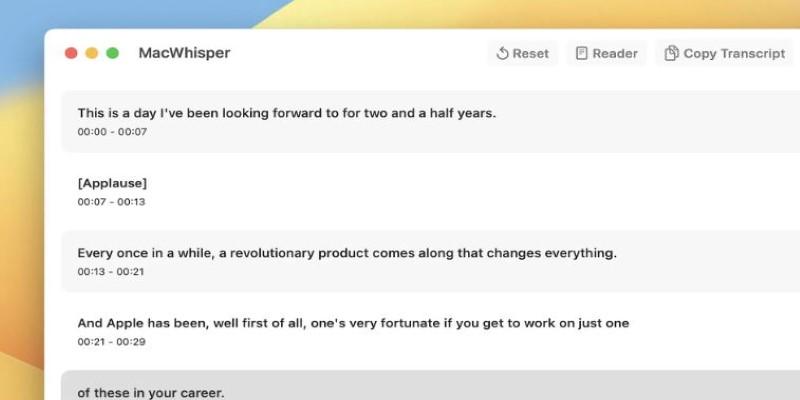
When it’s done, you’ll see the full transcription displayed in a text window, broken into time-stamped segments. This makes it easy to follow along or refer back to specific moments in the audio. You can scroll through, search within the text, or make quick edits if you spot small errors or names that didn’t come through cleanly.
From there, you can export the transcription as a .txt, .srt, or .vtt file—perfect for subtitles, sharing, or storing your notes. For interviews or podcasts, this is a game-changer. It saves hours of manual typing and gives you a solid first draft you can clean up as needed.
Even better, because the AI handles punctuation and speaker breaks reasonably well, most of the text is readable without much work. Just keep in mind that AI transcription still isn’t perfect with heavy accents, rapid-fire conversation, or background noise, so a quick proofread is always a good idea.
Going Beyond MacWhisper (Optional)
If MacWhisper doesn’t fit your needs or you’re curious about alternatives, there are a few more free AI transcription options available on Mac, though they may involve a bit more setup.
One alternative is using OpenAI’s Whisper via Terminal, which gives you full control but requires installing Python and running scripts manually. This isn't ideal for most users, but it can be useful for those who want more automation or batch processing.
Another option is Whispr, a lightweight Mac client that uses the same underlying model as MacWhisper. Although it's not as feature-rich, it can still work well for quick jobs.
Some users also try Otter.ai or Descript, which are web-based and offer free plans; however, these often have limitations, such as monthly minutes or account creation. Unlike MacWhisper, they may require you to upload files to a server, which some users prefer to avoid for privacy reasons.
If you're comfortable using Terminal and want a headless solution, you can install Whisper through Homebrew and transcribe files directly using command-line instructions. But this approach is better suited for those already familiar with running Python scripts or doing light automation.
Conclusion
Transcribing audio with AI on a Mac doesn’t need to cost anything. Thanks to tools like MacWhisper, you can turn long recordings into readable text quickly and without fuss. It works offline, supports all common formats, and gives you accurate results with just a few clicks. Whether you're handling interviews, podcasts, class lectures, or meeting notes, this setup can save hours of manual effort. Once you’ve used it a couple of times, it becomes part of your regular workflow. There’s no learning curve and no catch. Just a simple, smart way to use free AI on your Mac to make your recordings useful. It’s not only convenient—it’s quietly transformative.